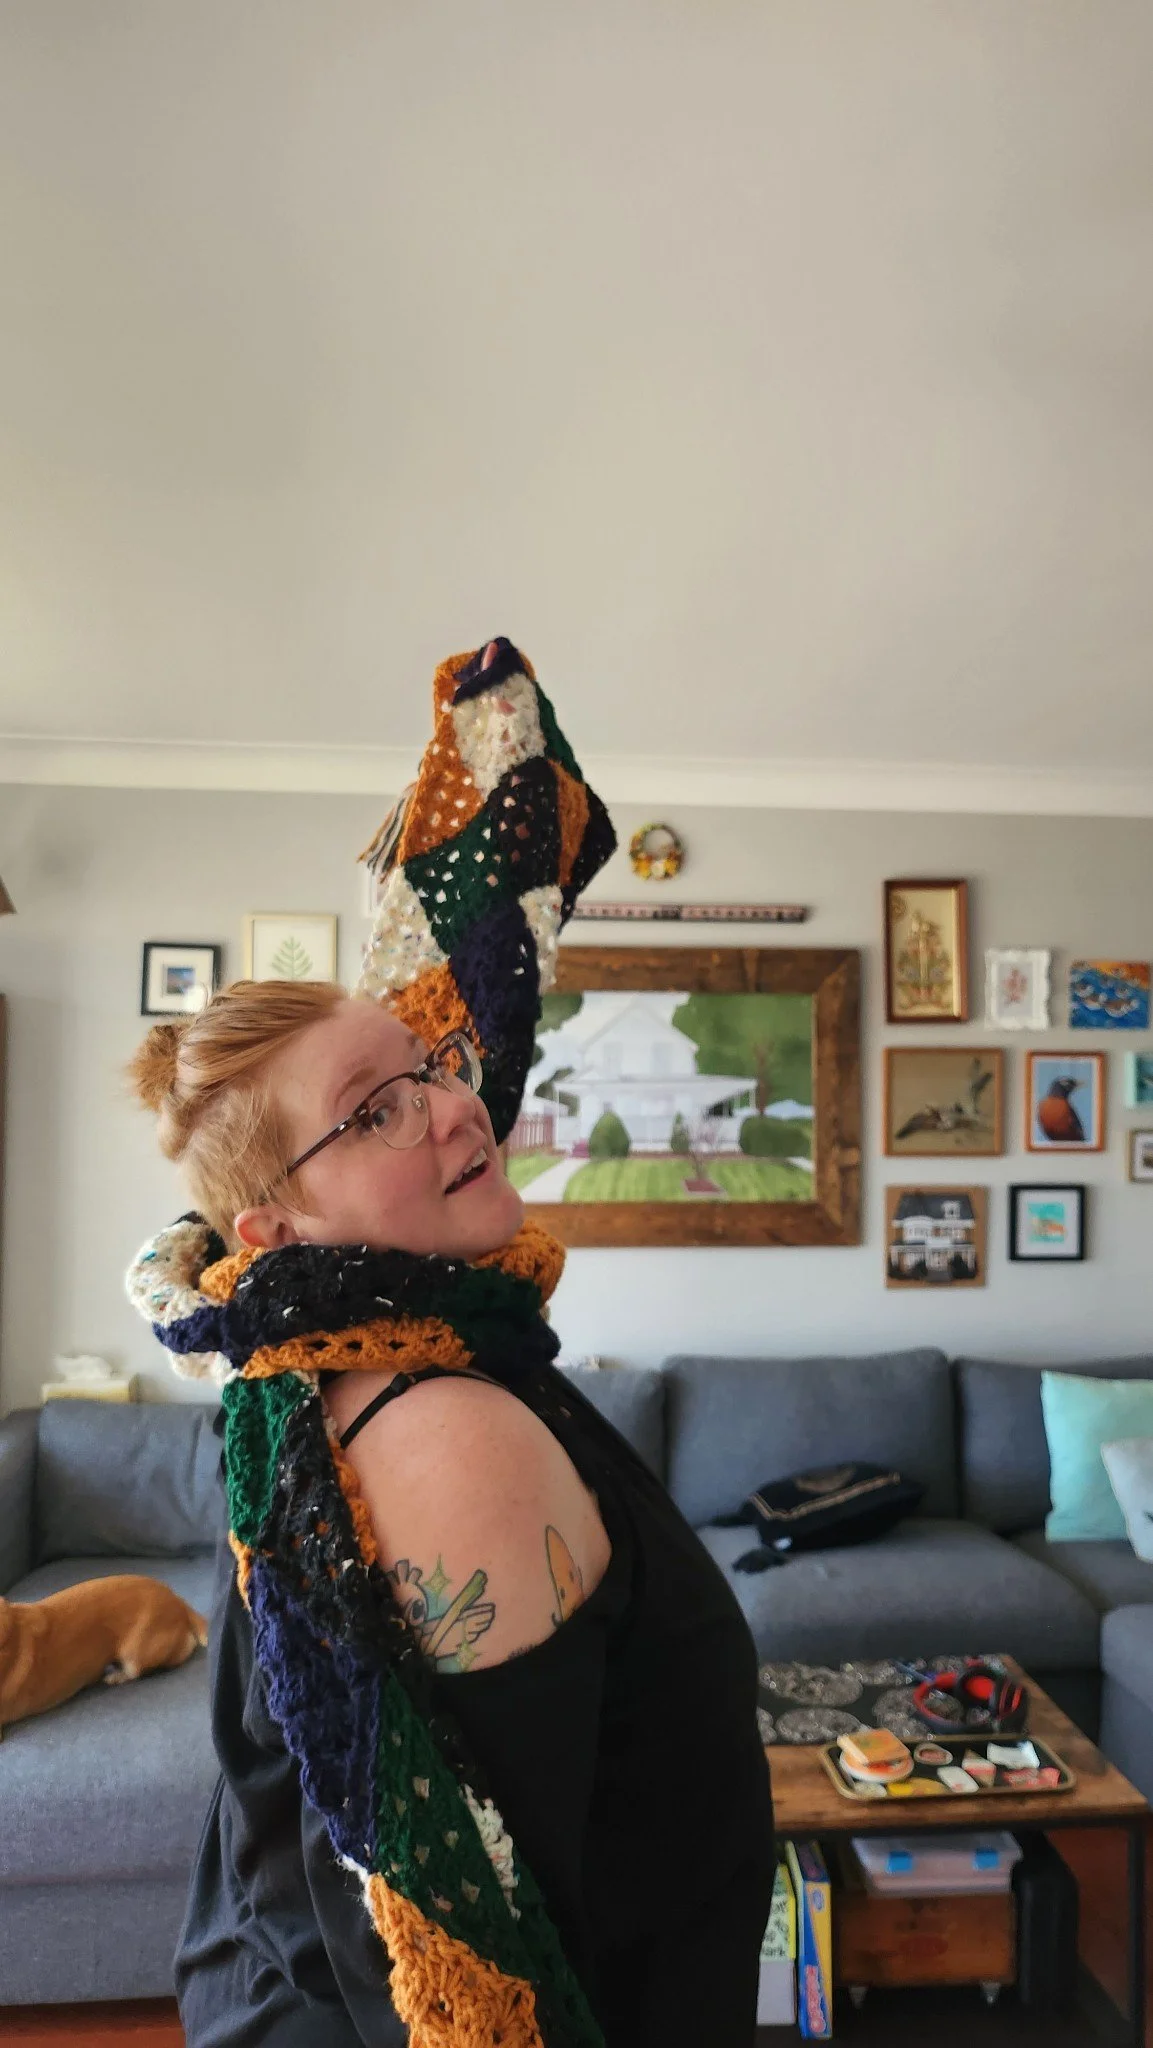
Page of Diamonds Scarf - Pattern
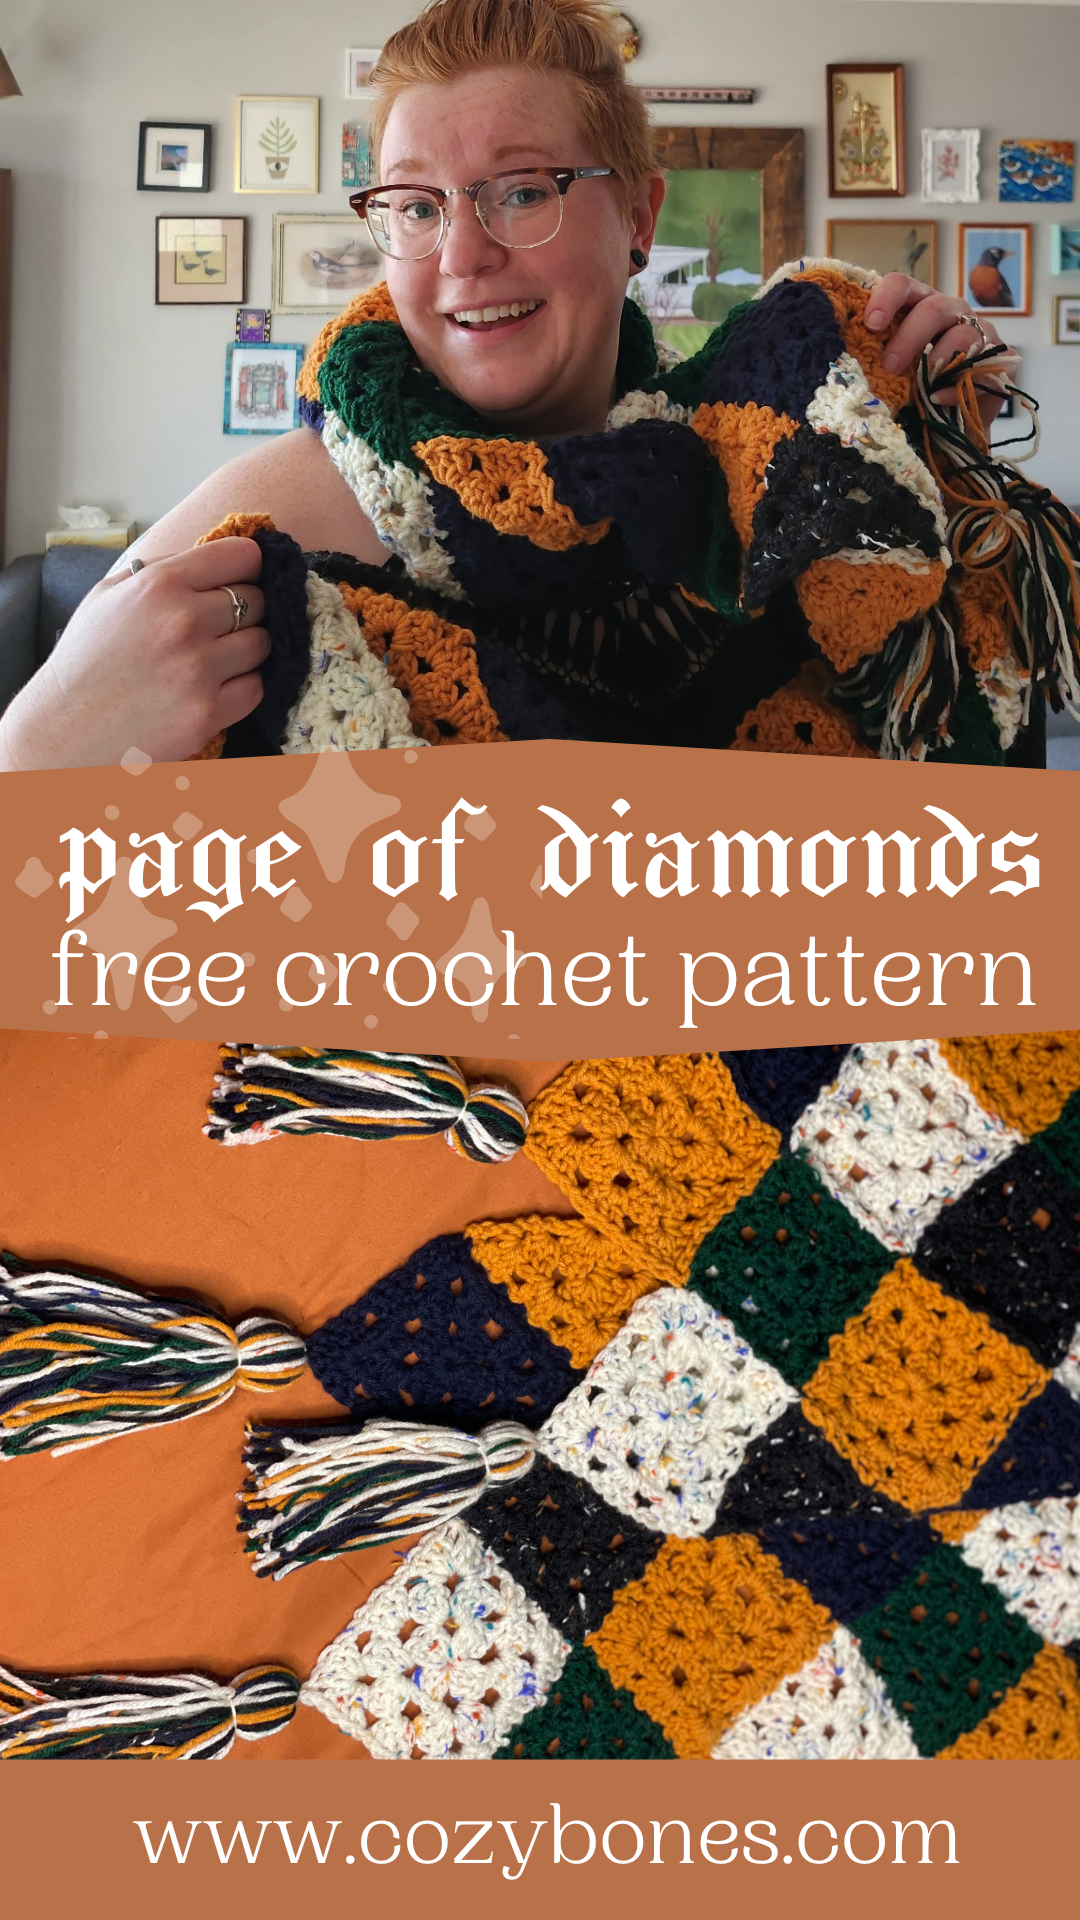
Make your very own granny square scarf with my free crochet pattern. The Page of Diamonds Scarf is made out of simple granny squares and granny triangles which stitch together to make a super versatile and customizable diamond pattern.
About The Pattern:
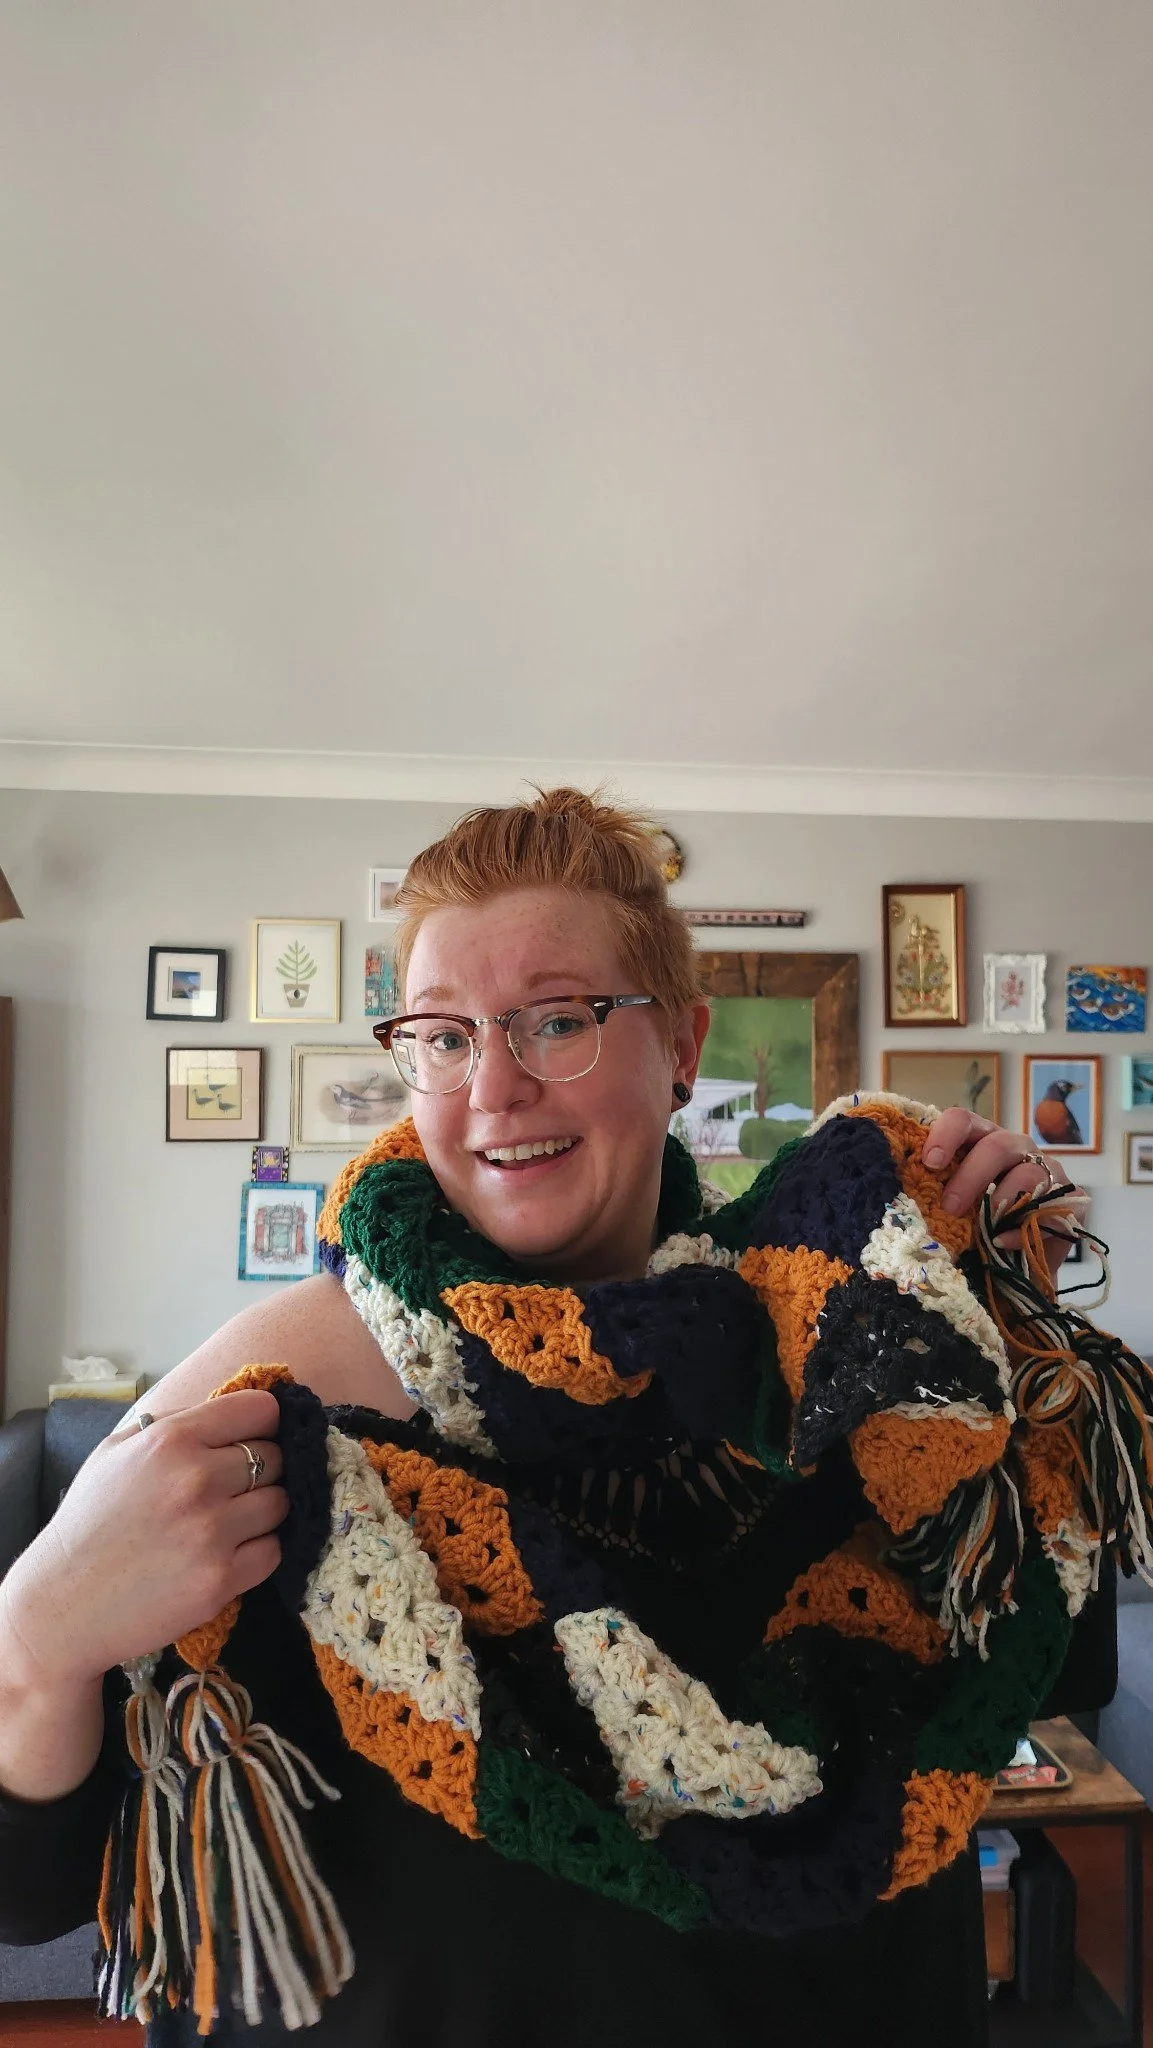
I originally designed this scarf with my friends in mind. When it comes to clothing, all of my friends have very unique and individual style and I designed this scarf with that eclectic kind of style in mind. That being said, I have a vision of making the Page of Diamonds Scarf in a single colour for myself some time soon, can you imagine this piece in solid black!?
I wanted my first freebie pattern to be super beginner friendly, and easy to customize, and I think the Page of Diamonds Scarf is just that.
Materials
– Worsted weight yarn (I used a single strand of acrylic Bernat Premium)
– Crochet hook 7 mm
– Tapestry needle
– Scissors
Measurements
Width: 11” inches
Length: 87” inches (without tassels)
Tassels: 6” inches long
Gauge
Each square should roughly be 4.5” inches x 4.5 inches.
Each triangle should roughly be 2.5” inches 4.5” inches.
Abbreviations
Ch - chain
St - stitch
Sl St - Slip Stitch
Dc - Double Crochet
Notes
This pattern is written in US terminology
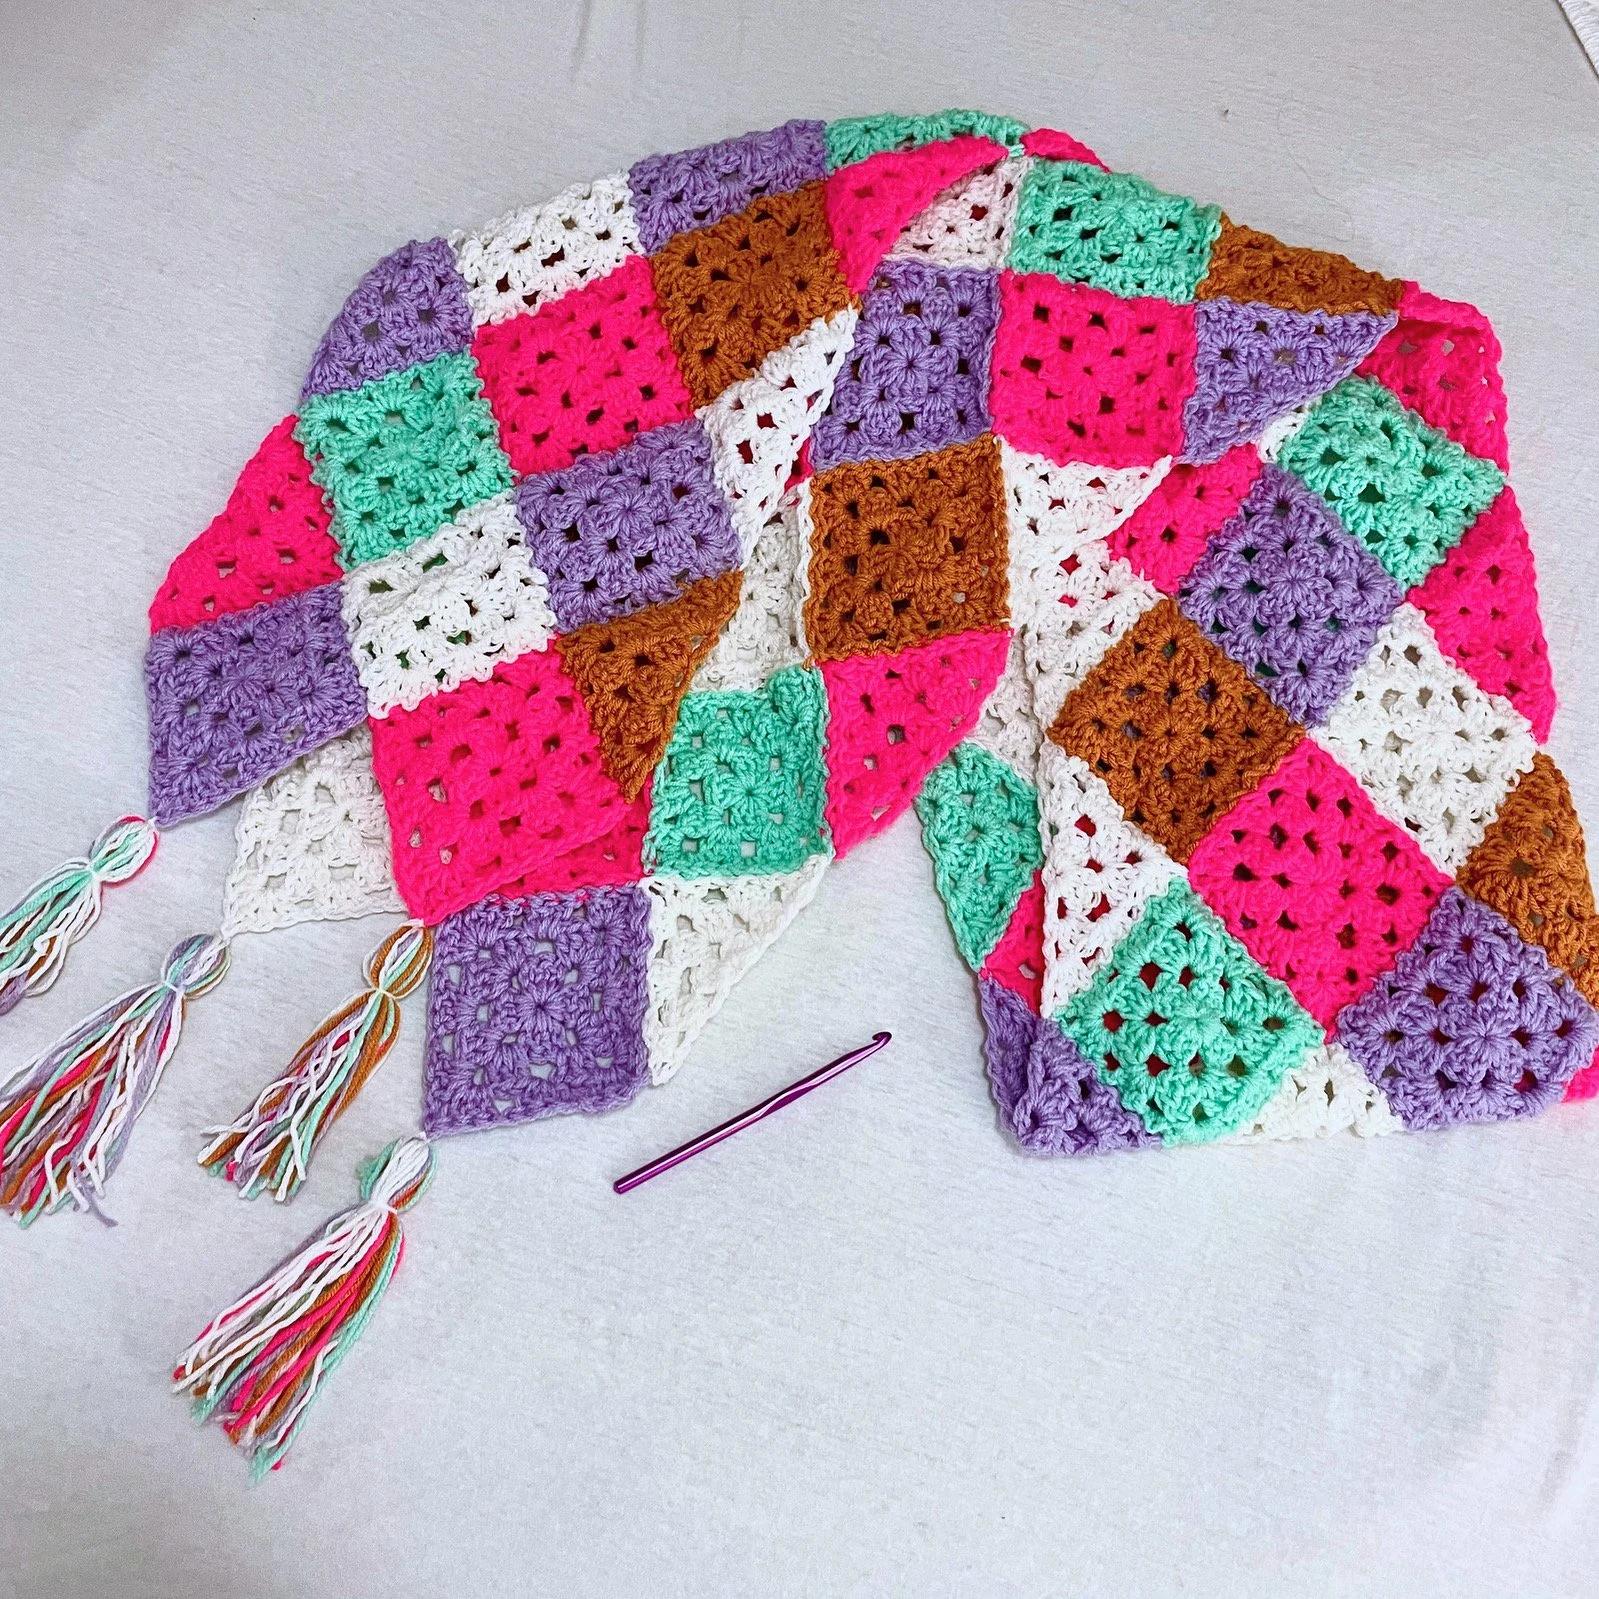
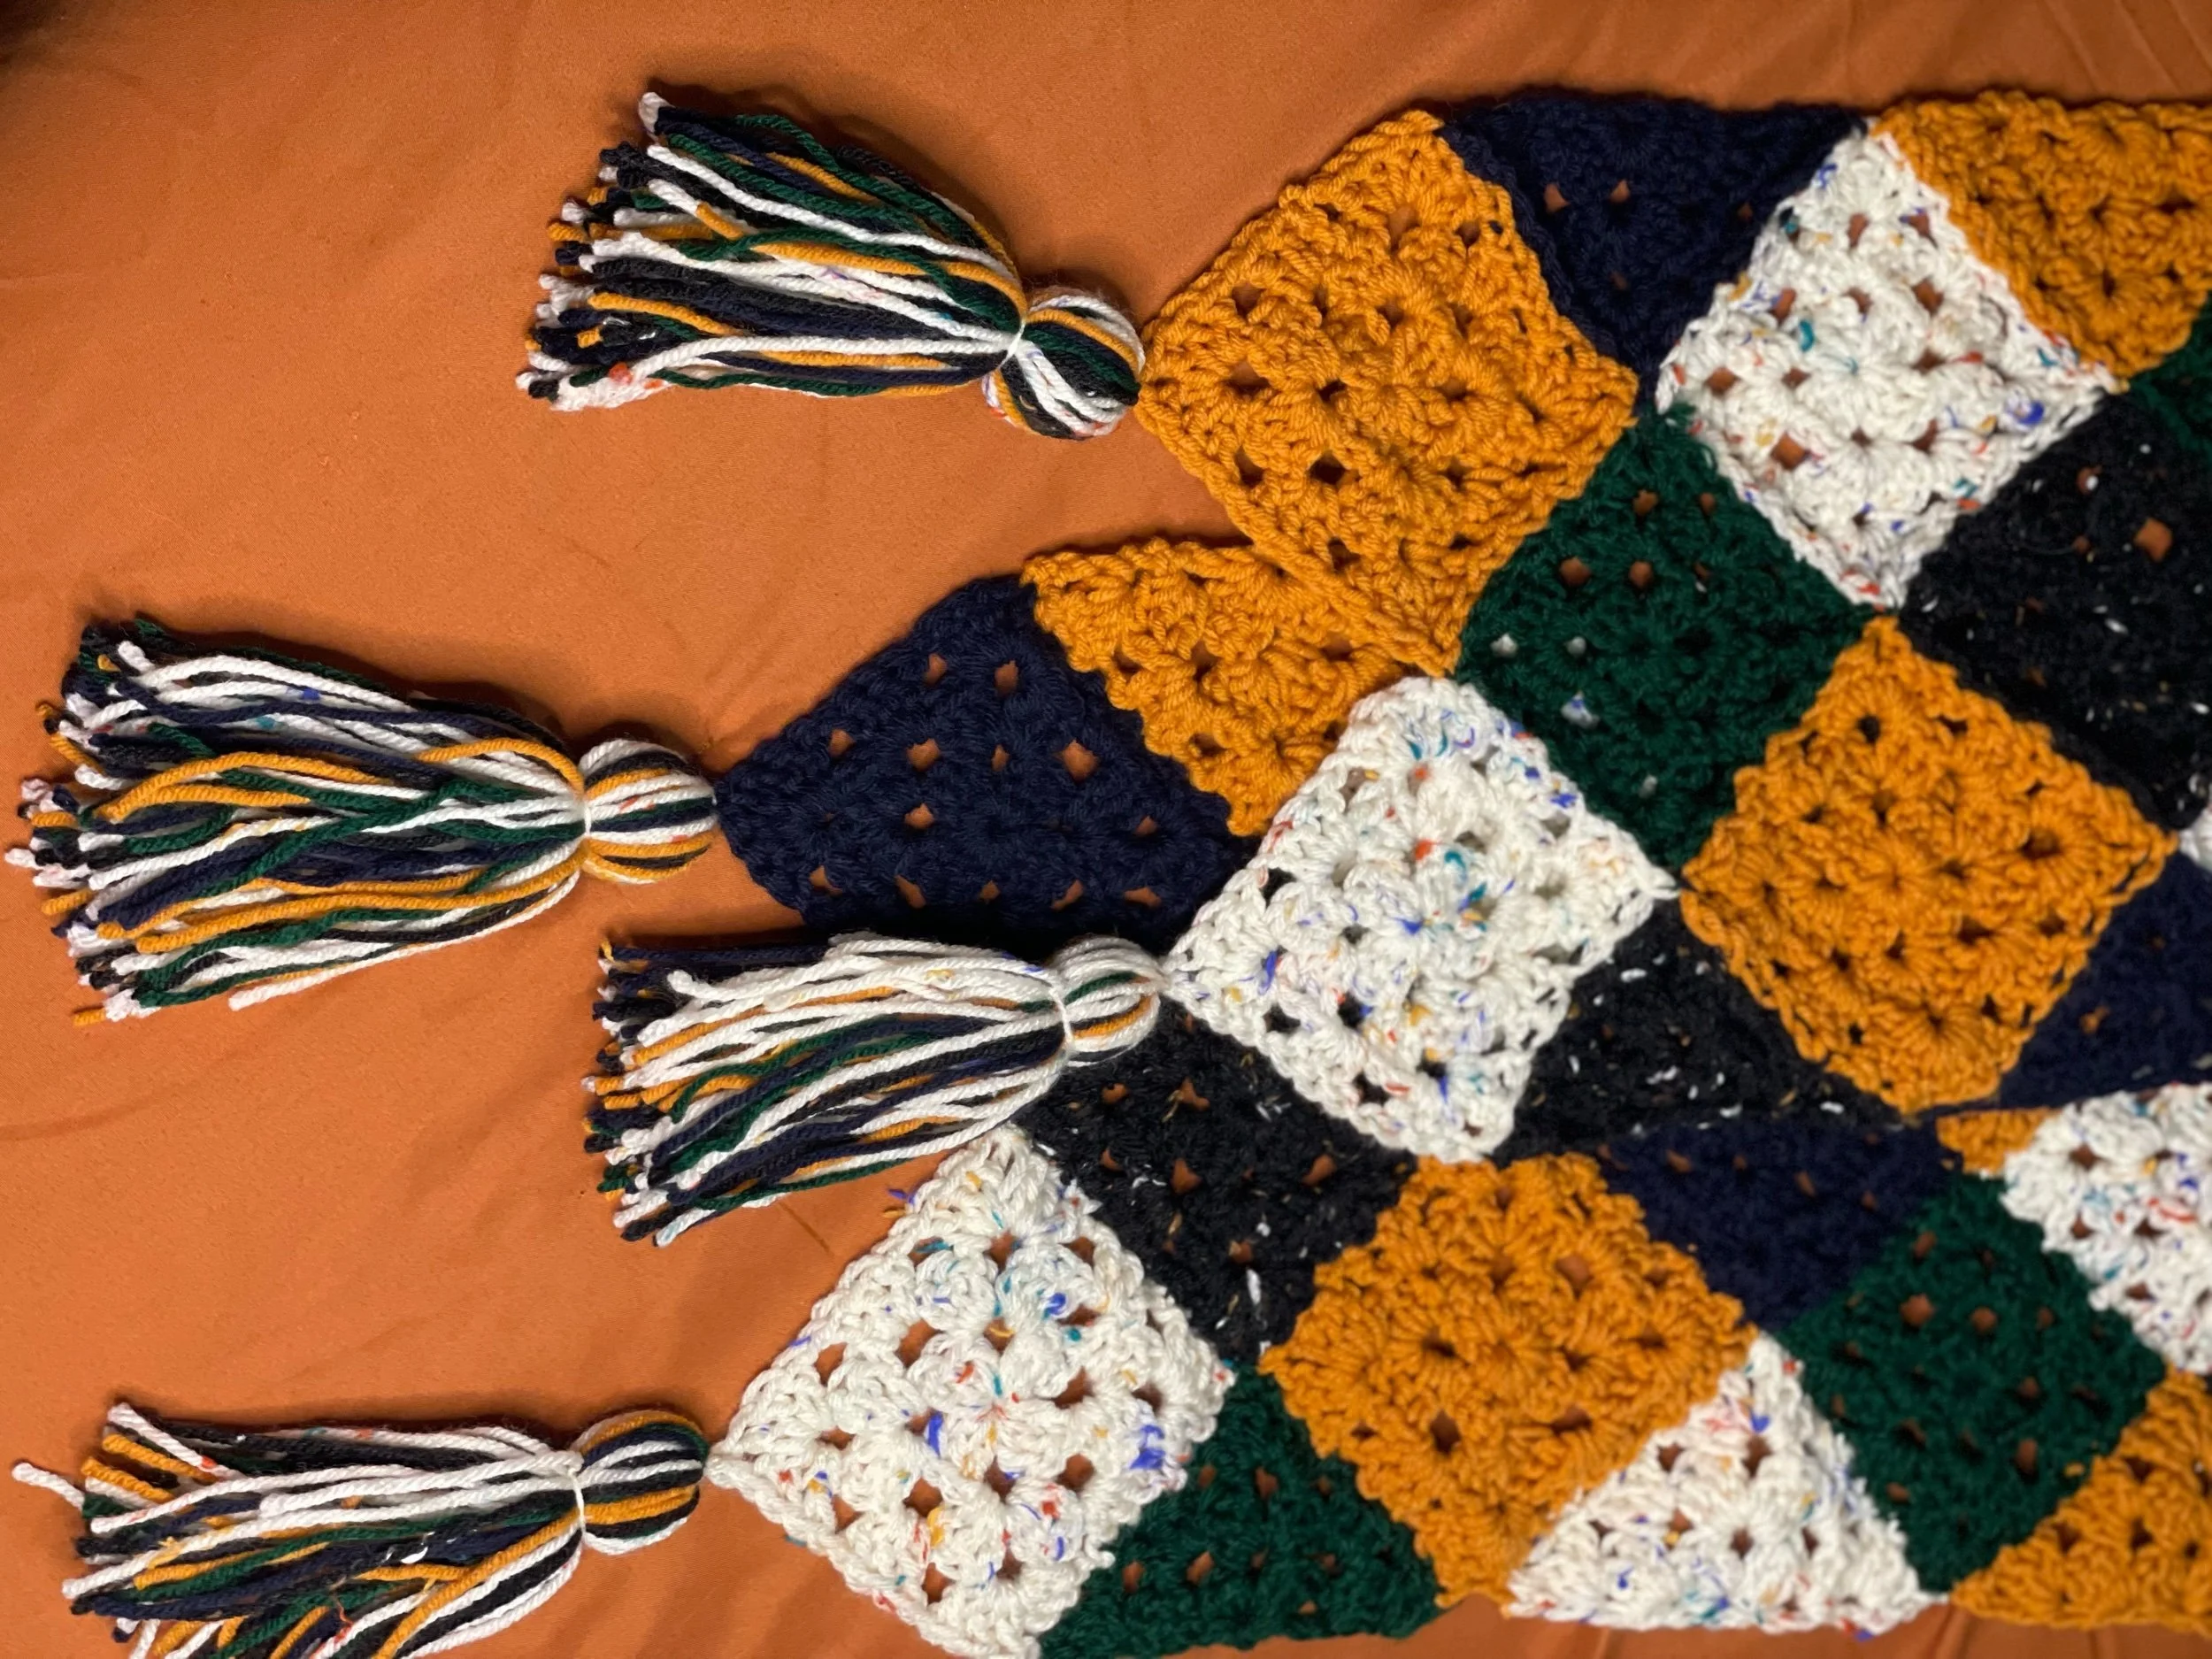
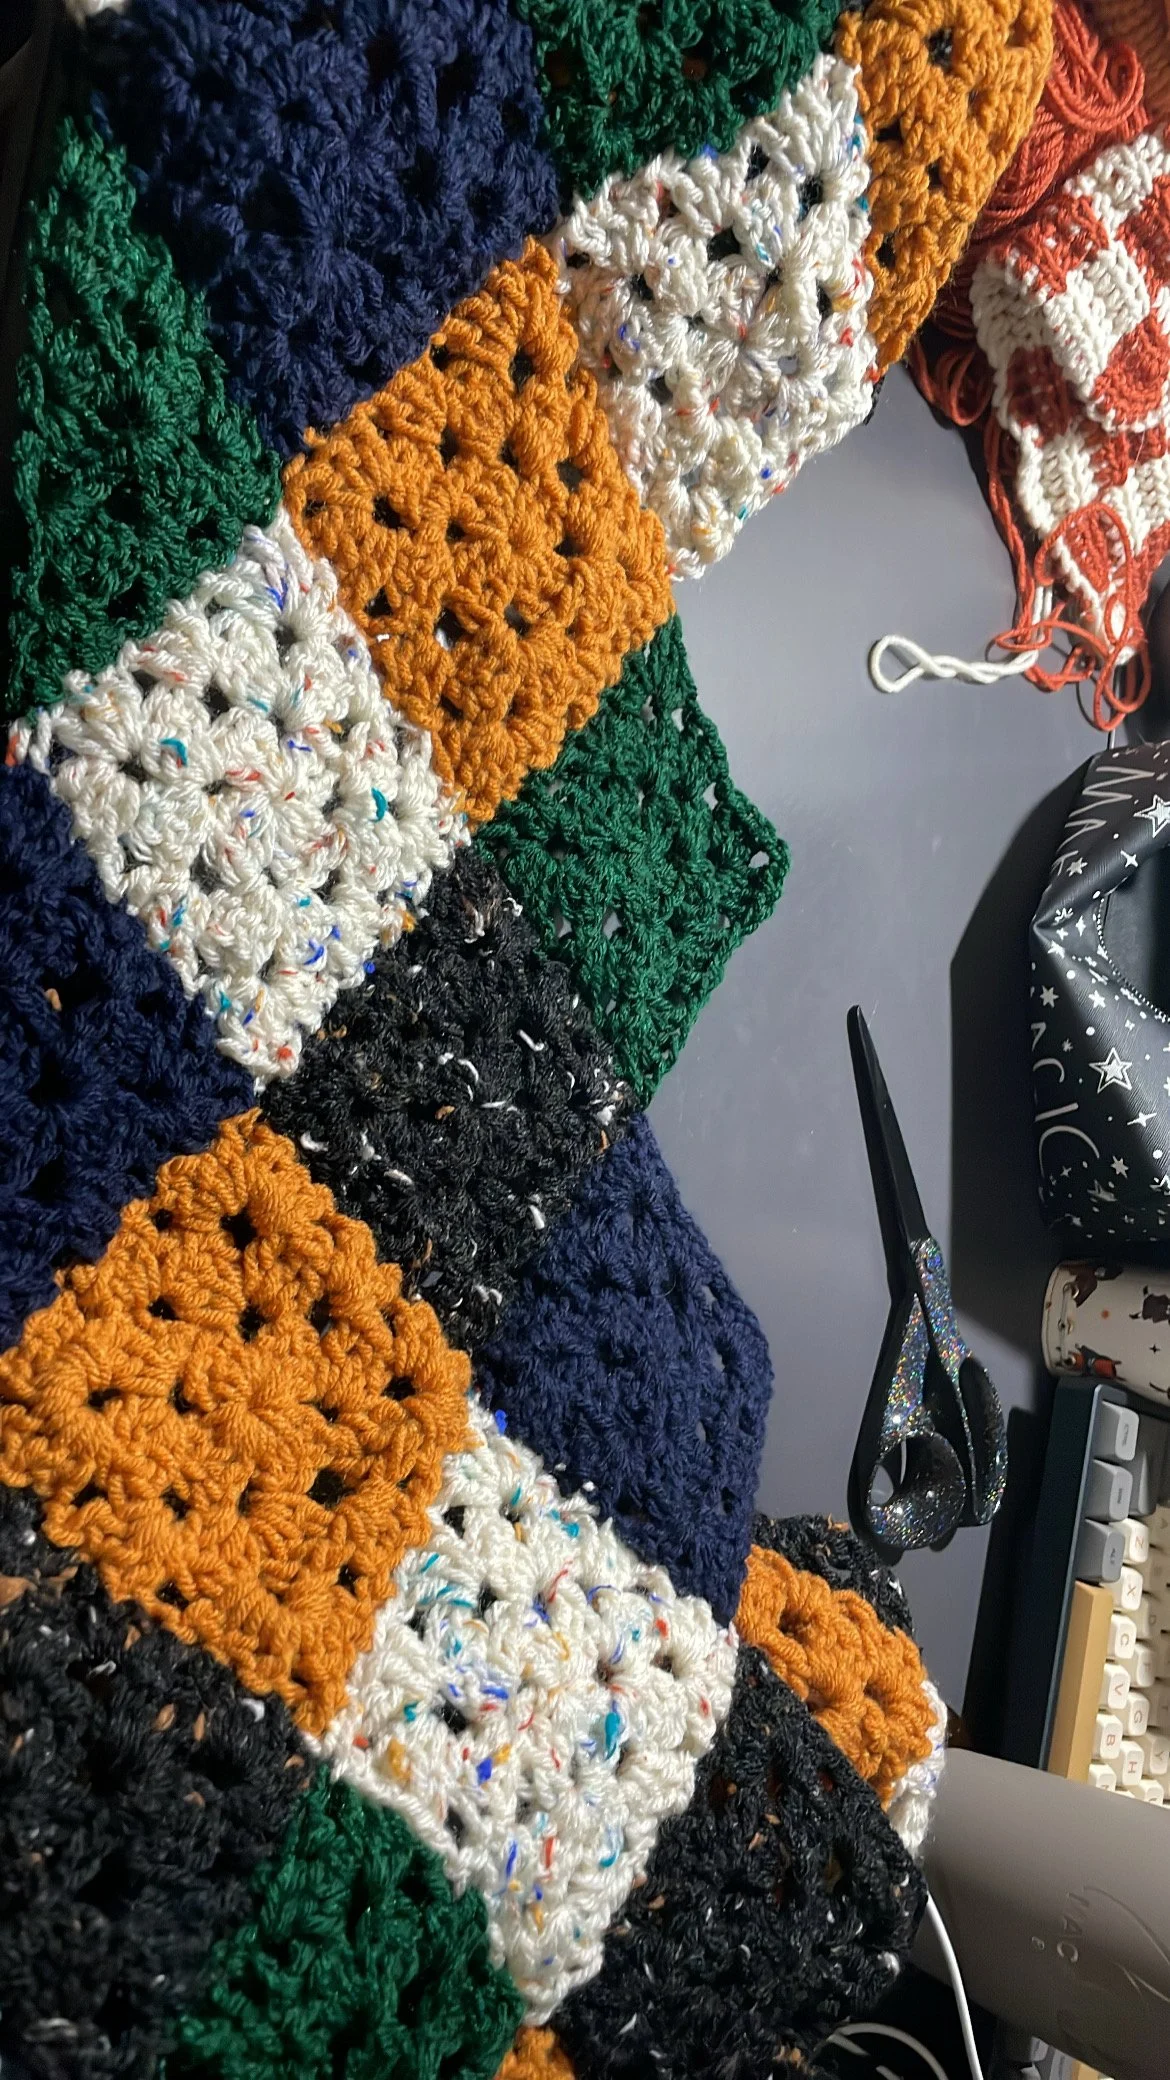
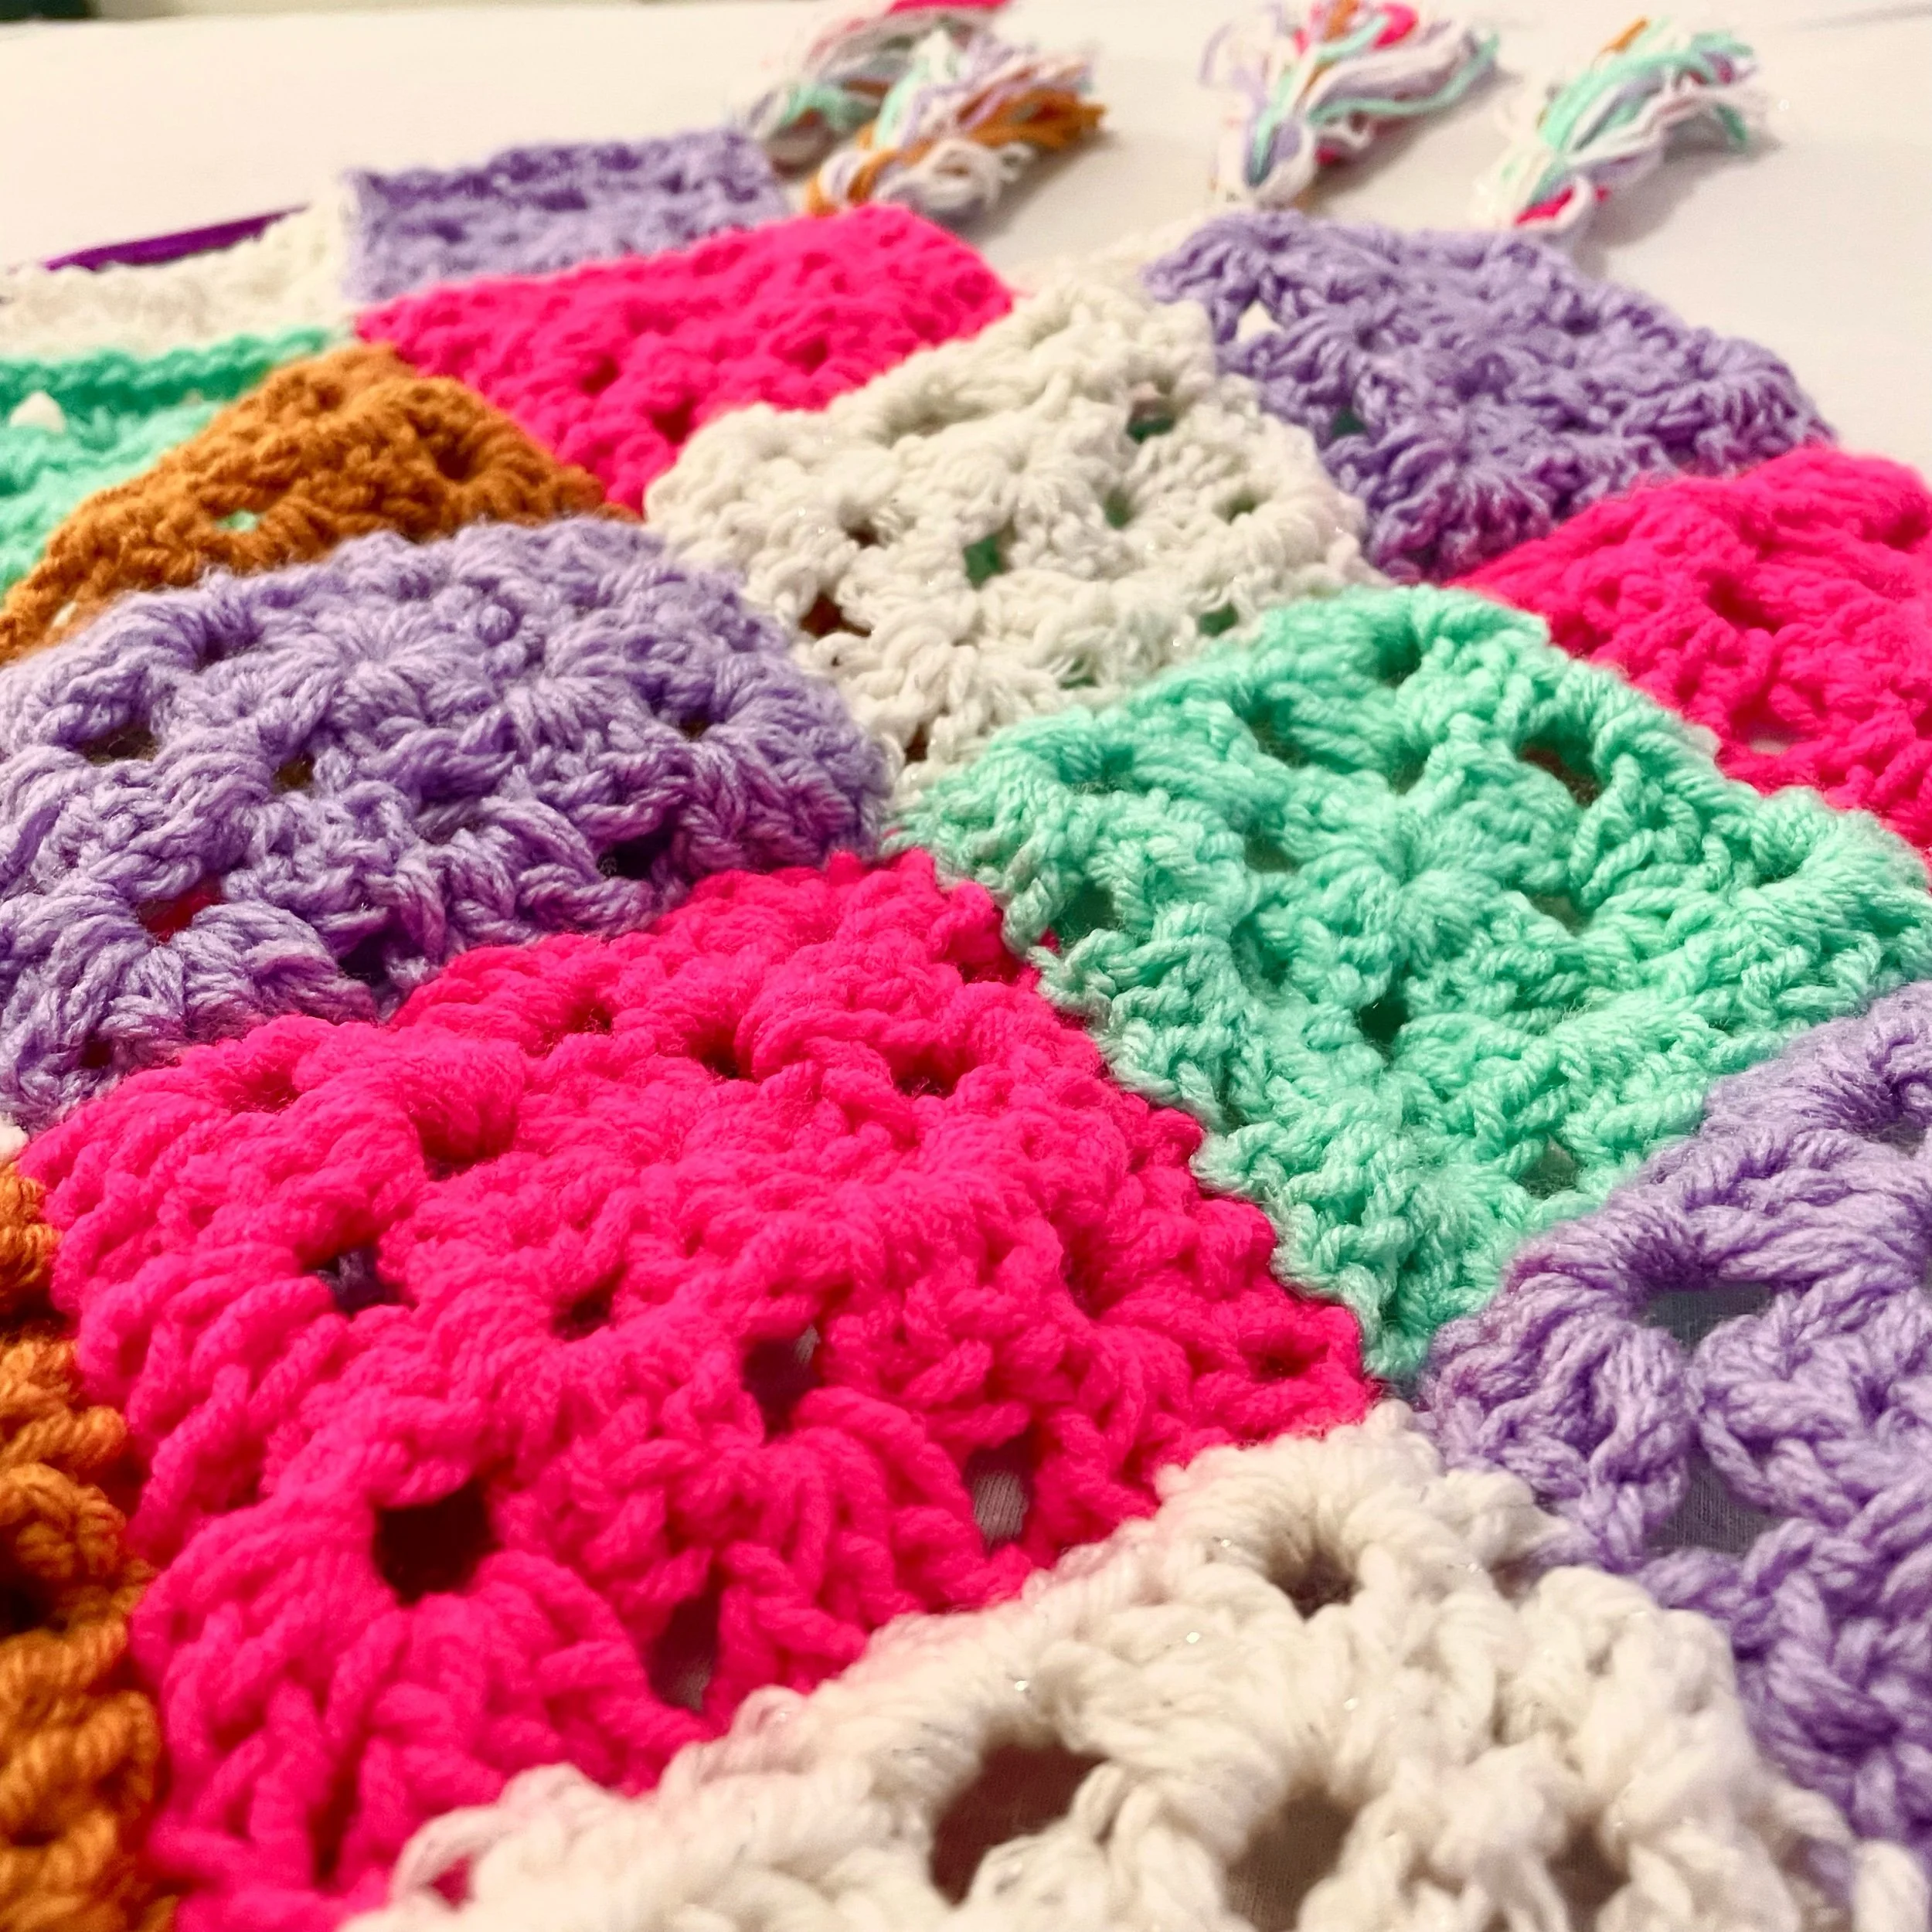
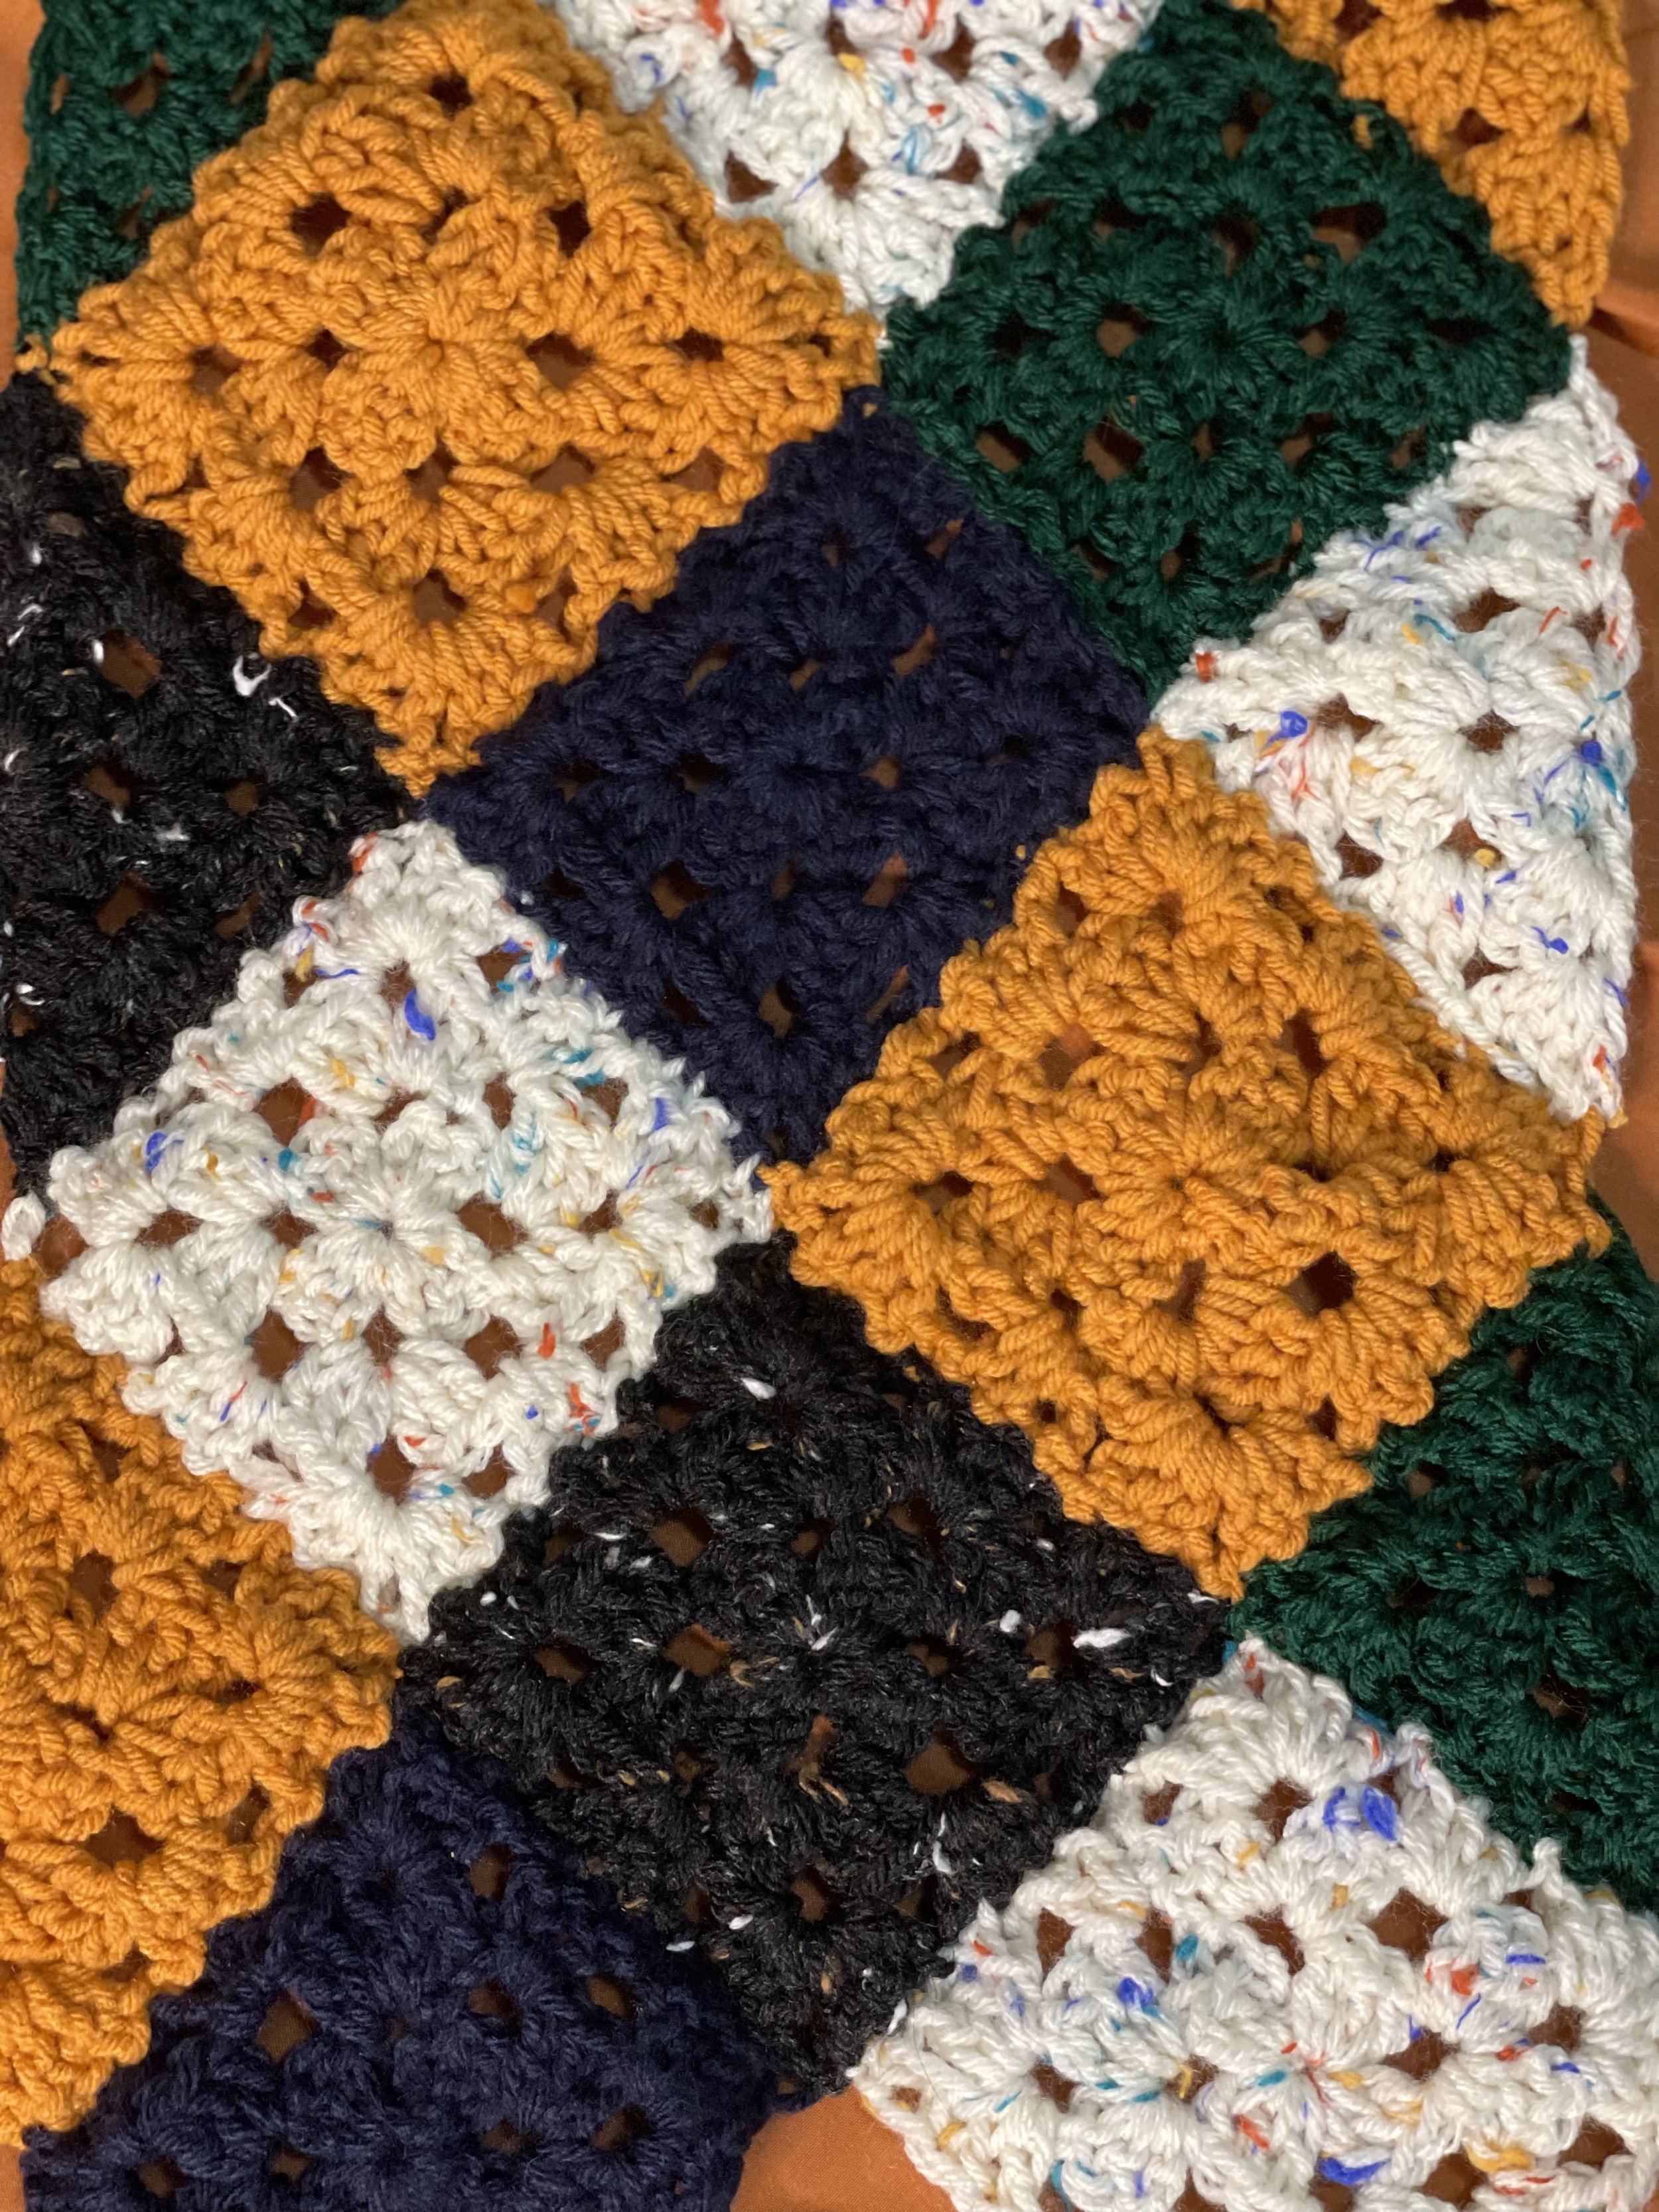
This scarf calls for 44 granny squares and 28 granny triangles. You can customize this pattern by adding or taking away as many squares as you would like.
Granny Square Pattern
Start by chaining 4 and sl st together to create a loop to work in.
Round 1:
Ch 3, (first ch 3 of EVERY ROUND counts as a dc st), work 2 dc into the loop, ch 3, work 3 dc into the loop, ch 3, work 3 dc into the loop, ch 3, work 3 dc into the loop, ch 3. Sl st into the first st of the round and turn your work.
Round 2:
Ch 3, work 2 dc into ch space, ch 3, work 3 more dc in same ch space, ch 1, work 3 dc into next ch space, ch 3, work 3 more dc into same ch space, ch 1, work 3 dc into next ch space, ch 3, work 3 more dc into same ch space, ch 1, work 3 dc into next ch space, ch 3, work 3 more dc into same ch space, ch 1, sl st into the first st of the round and turn your work.
Round 3:
Ch 3, work 2 dc in the ch 1 space, ch 1, *work 3 dc into the ch 3 space, ch 3, work 3 dc into the same ch 3 space, ch 1, work 3 dc into the next ch 1 space, ch 1, work 3 dc into the next ch 3 space, ch 3, work 3 dc into the same ch 3 space, ch 1, *repeat until you get back to the beginning of round 3. Sl st into the first st of the round. Leave an 8 inch tail for easy sewing later on.
Granny Triangle Pattern
Start by chaining 4 and sl st together to create a loop to work in.
Round 1: Ch 4 (counts as a dc and a ch 1 space), in the loop dc 3, ch 2, dc 3, ch 1, dc 1 , tighten the loop..
Round 2: Ch 4 (counts as a dc and a ch 1 space) and turn your work. Working in the first ch 1 space, dc 3, ch 1, in the next ch 2 space dc 3, ch 2, dc 3, ch 1, dc 3 in the last ch 1 space, ch 1 and dc in the third ch of the initial 4 chains from row 1.
Round 3: Ch 4 (counts as a dc and a ch 1 space) and turn your work. Dc 3, ch 1 in each ch 1 space on the first side, dc 3, ch 2, dc 3 in the ch 2 space at the tip of the triangle, ch 1, dc 3 in each ch 1 space on the second side. Ch 1, dc 1 in the last st. Pull your yarn through to create a slip knot, leaving an 8 inch tail.
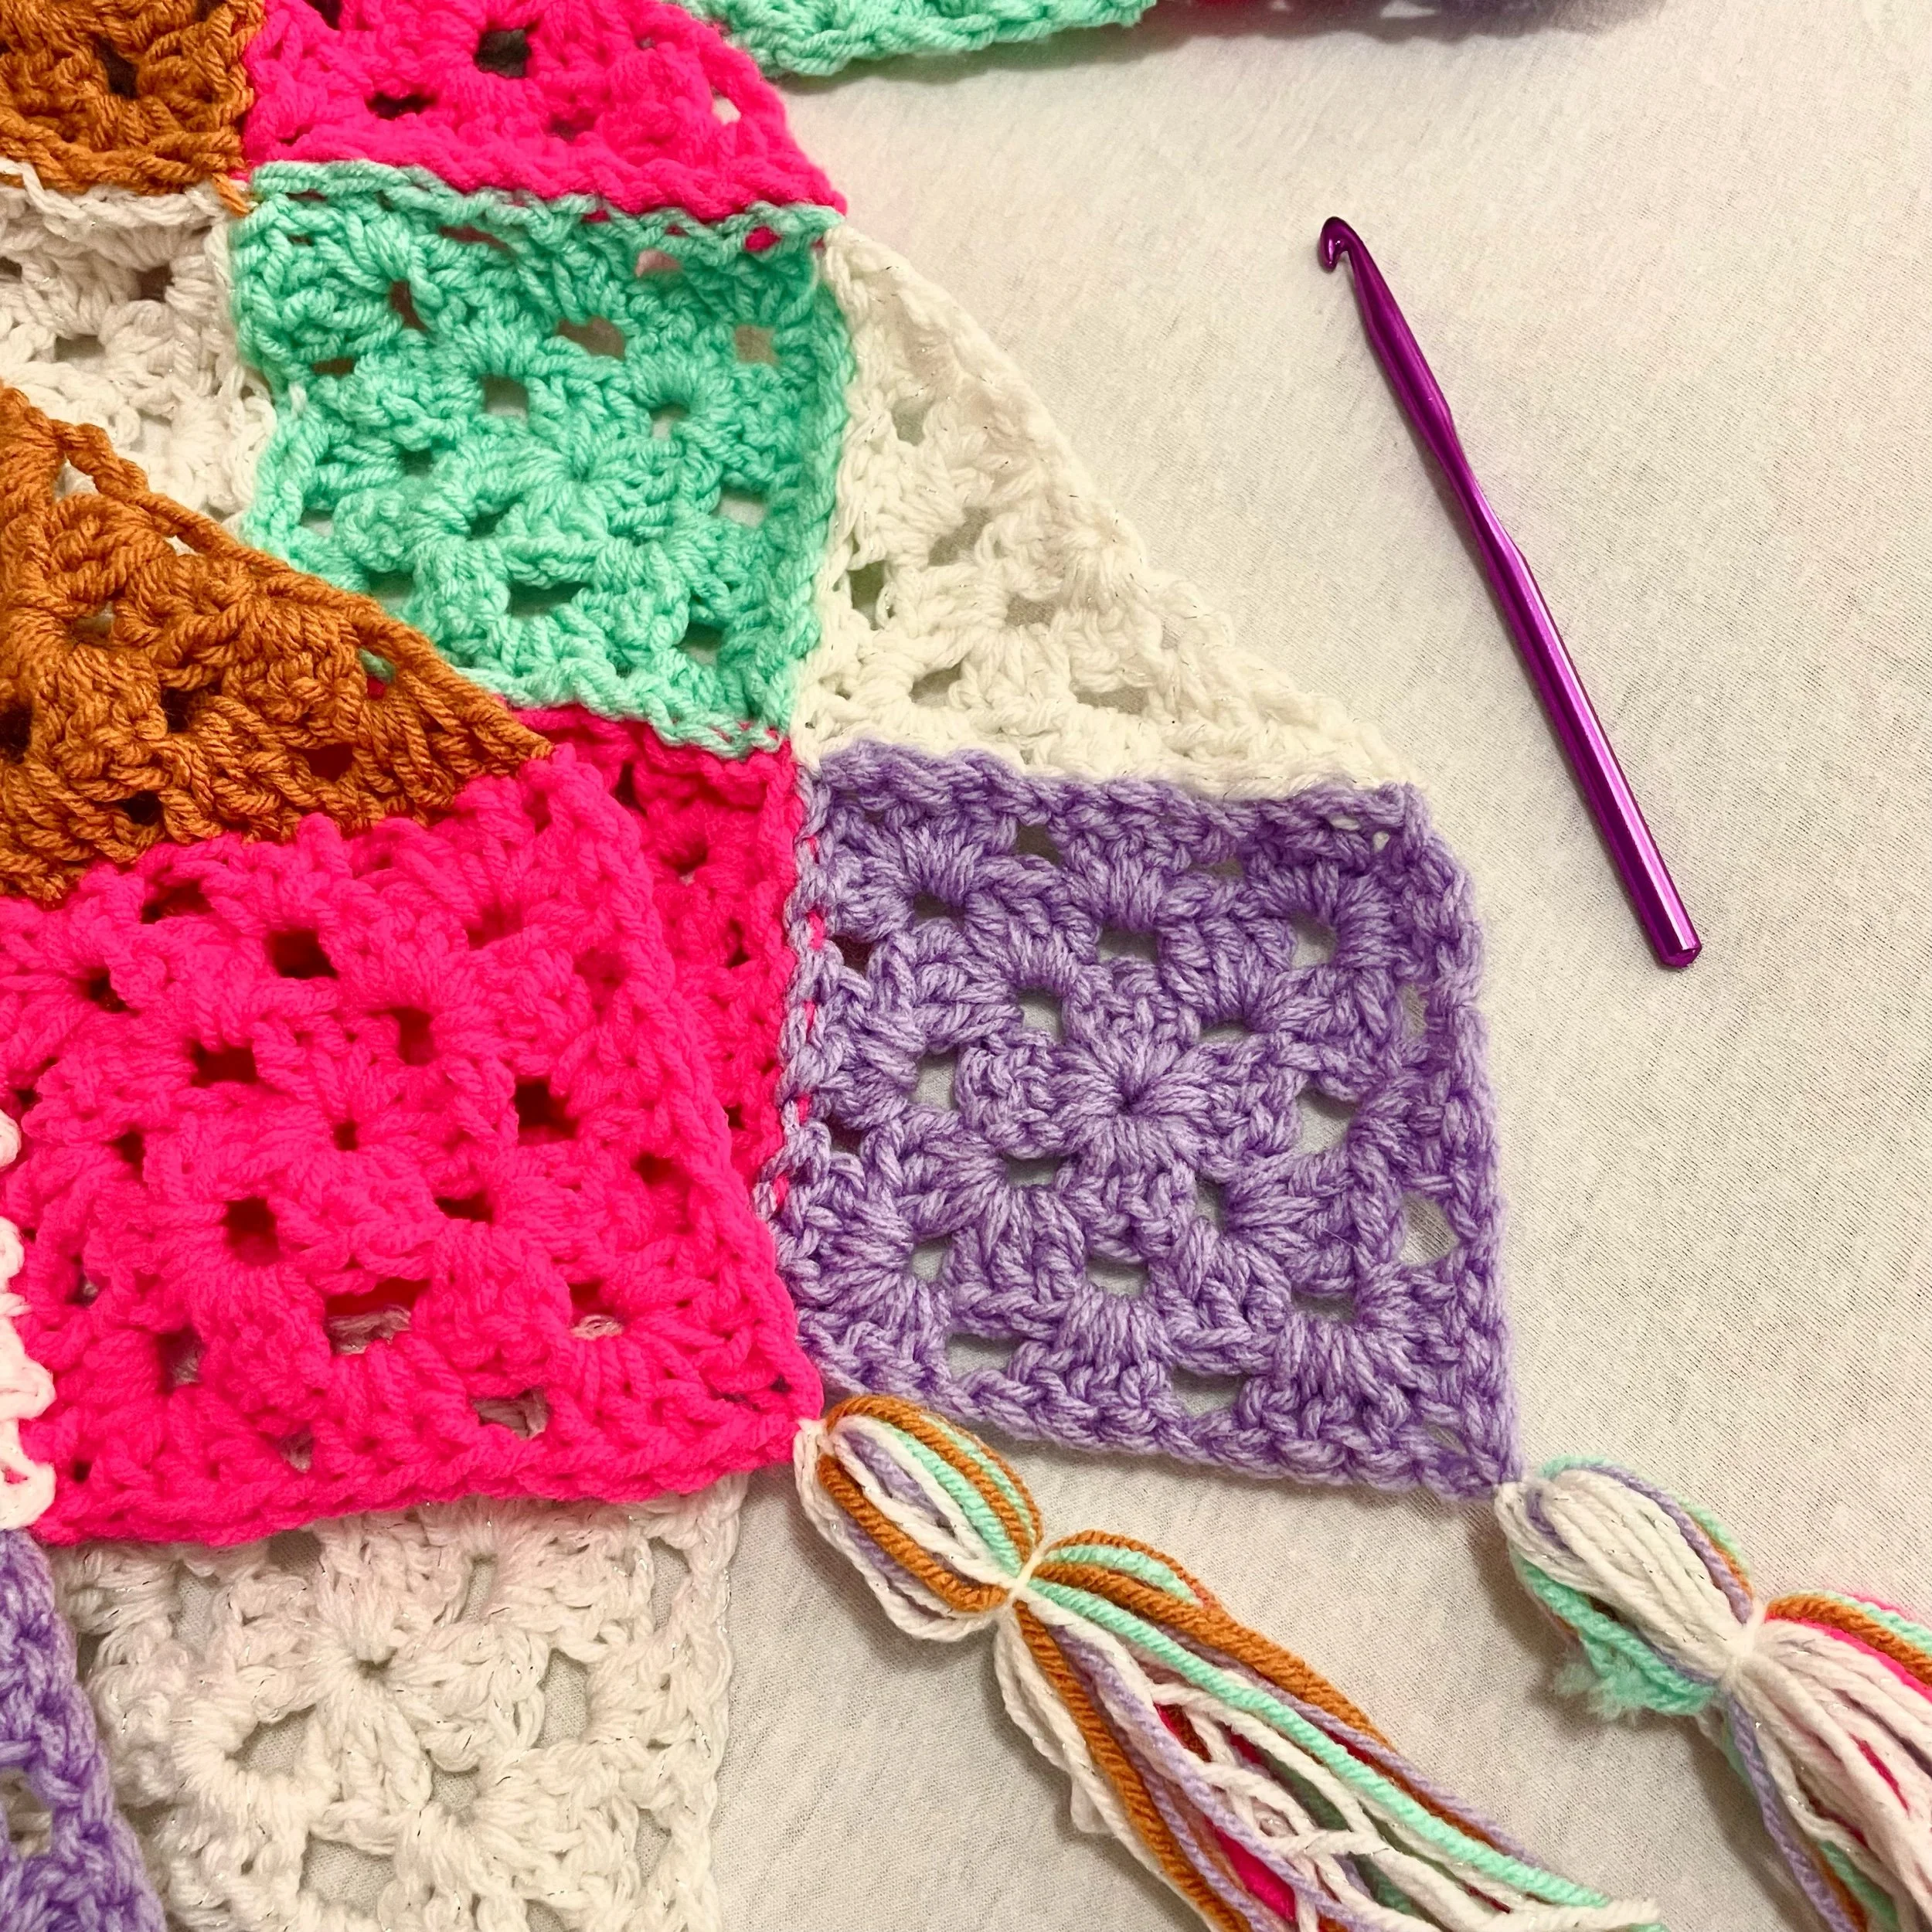
Assembly
Arrange all squares and triangles as indicated by the diagram below. Make sure that all your good sides are facing upwards. When you are sewing your pieces together, I recommend stacking the pieces you are sewing on top of eachother, with the good sides facing inward like a sandwich, and stitch the edges that way to make sure the good side of the scarf lays flat with no visible stitches or seams.

I also recommend weaving ends in as you go, as this can be a daunting project with just the ends alone!
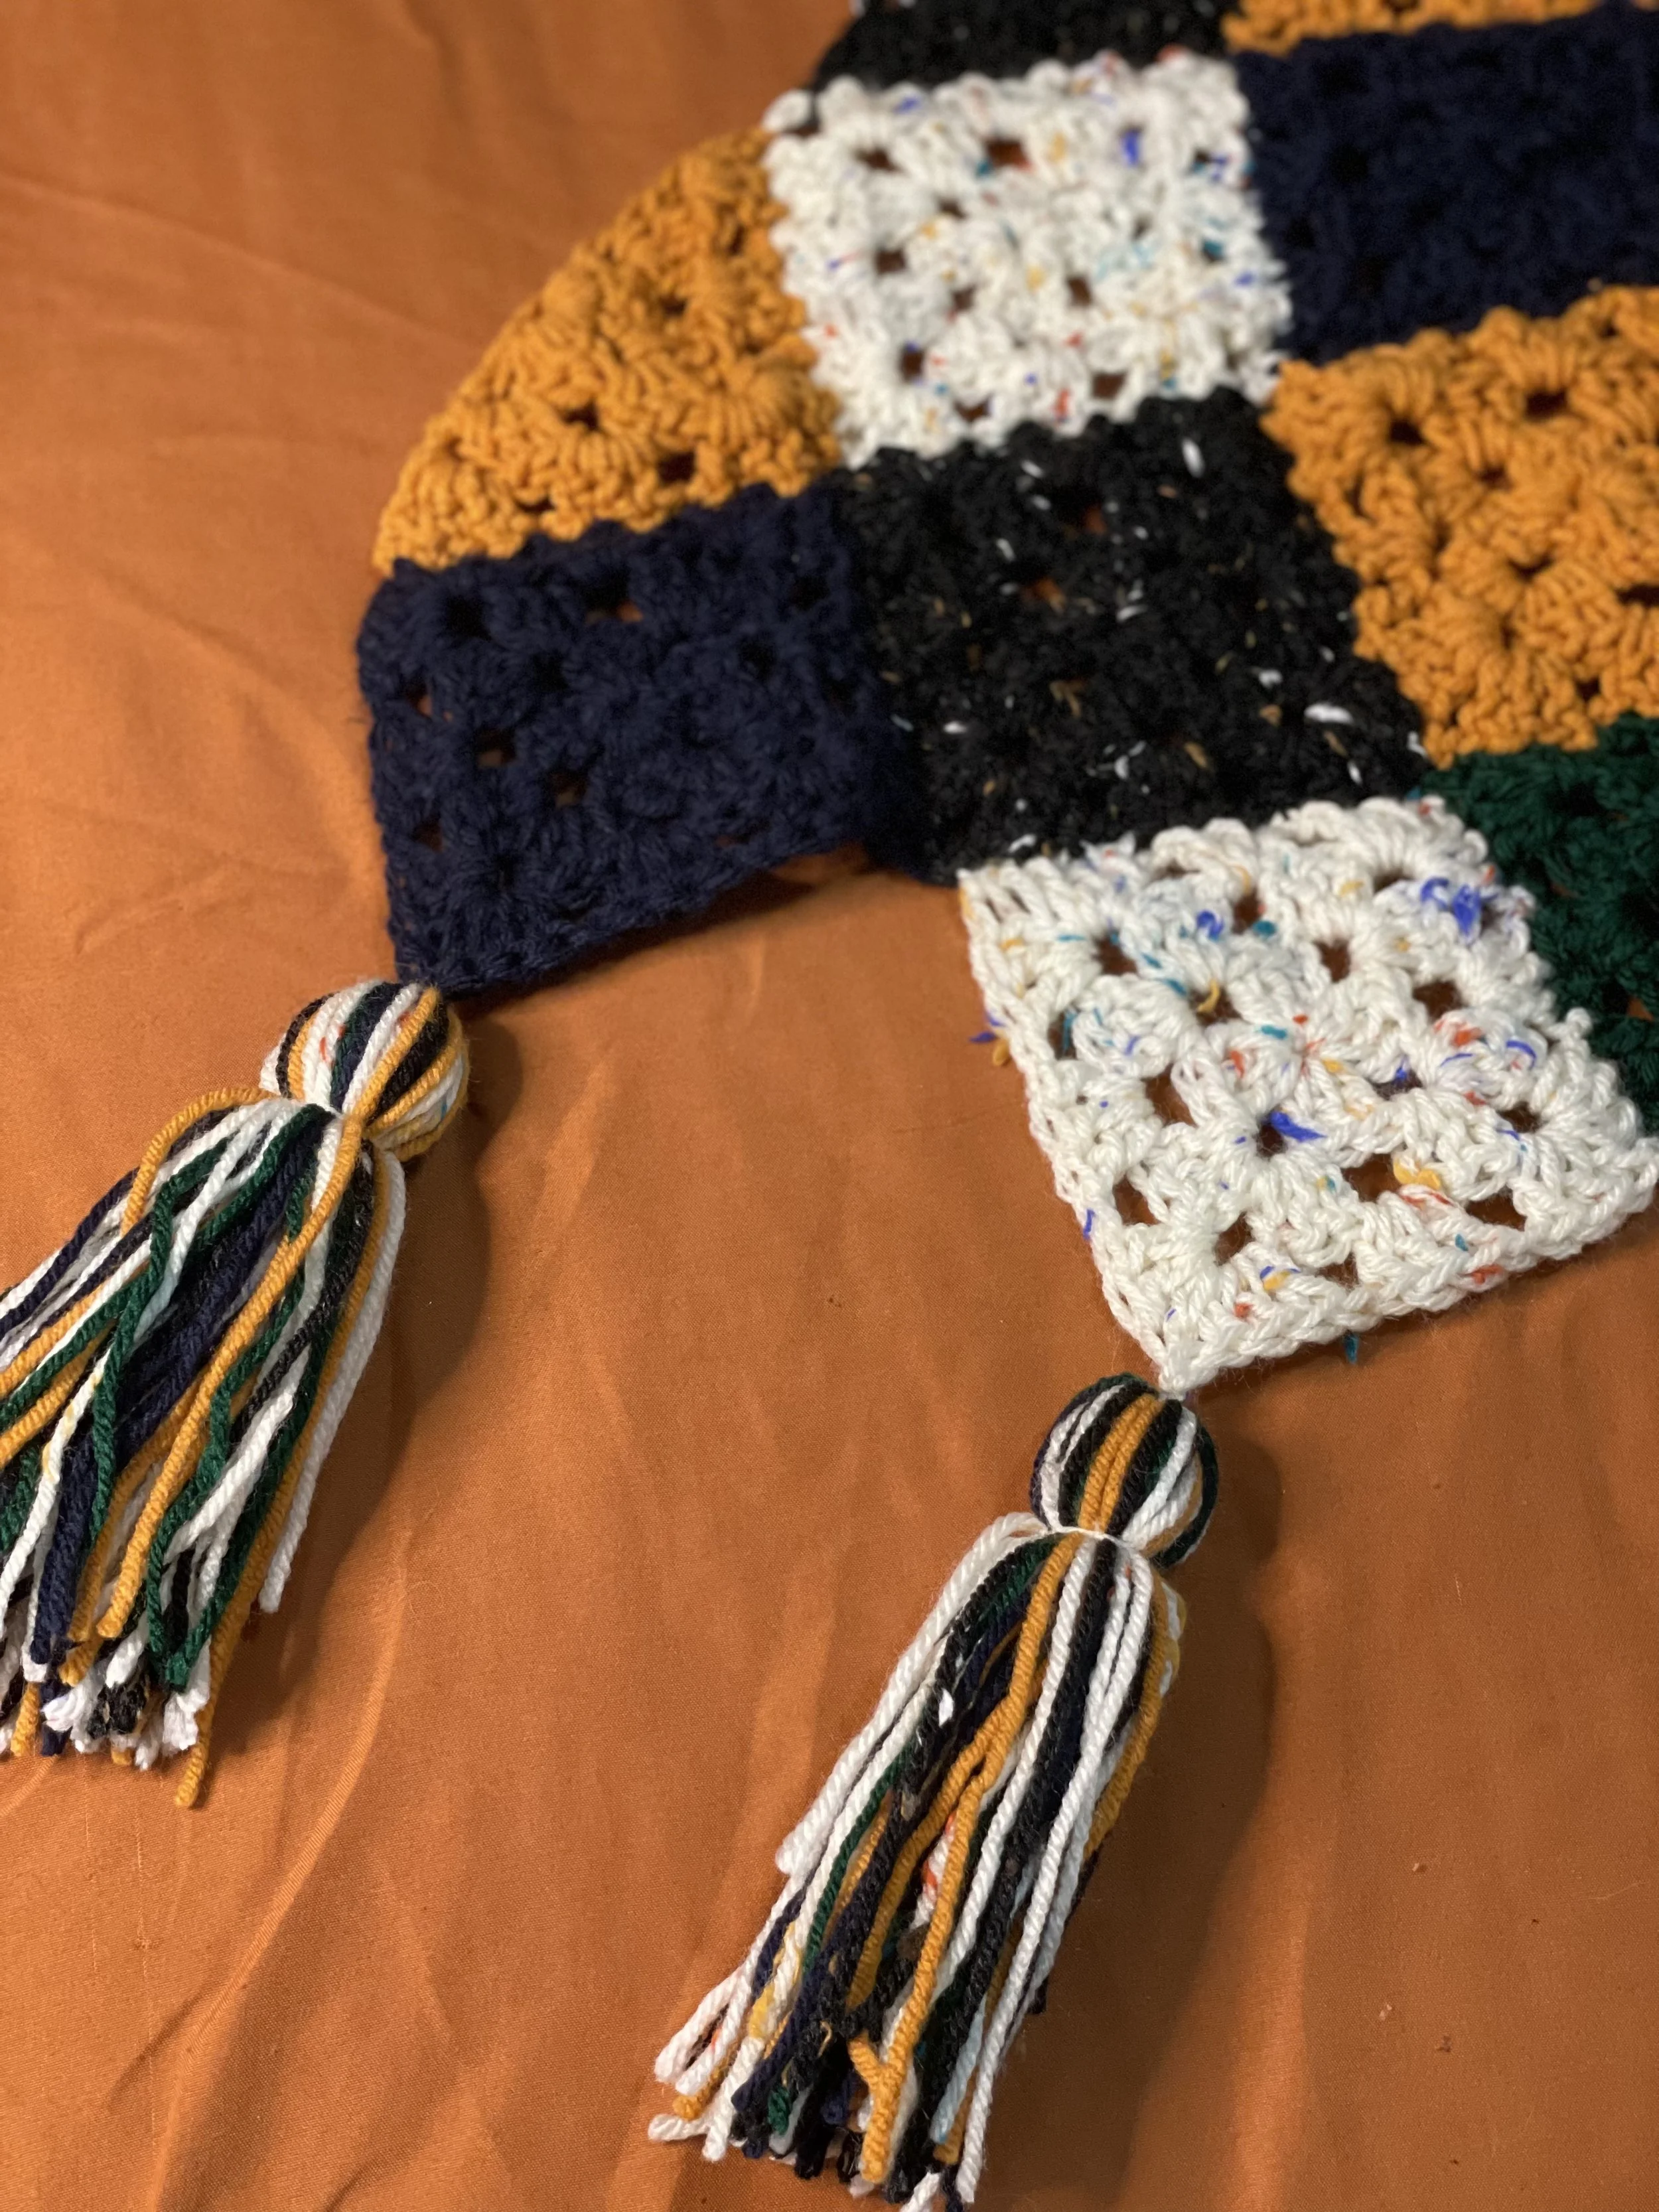
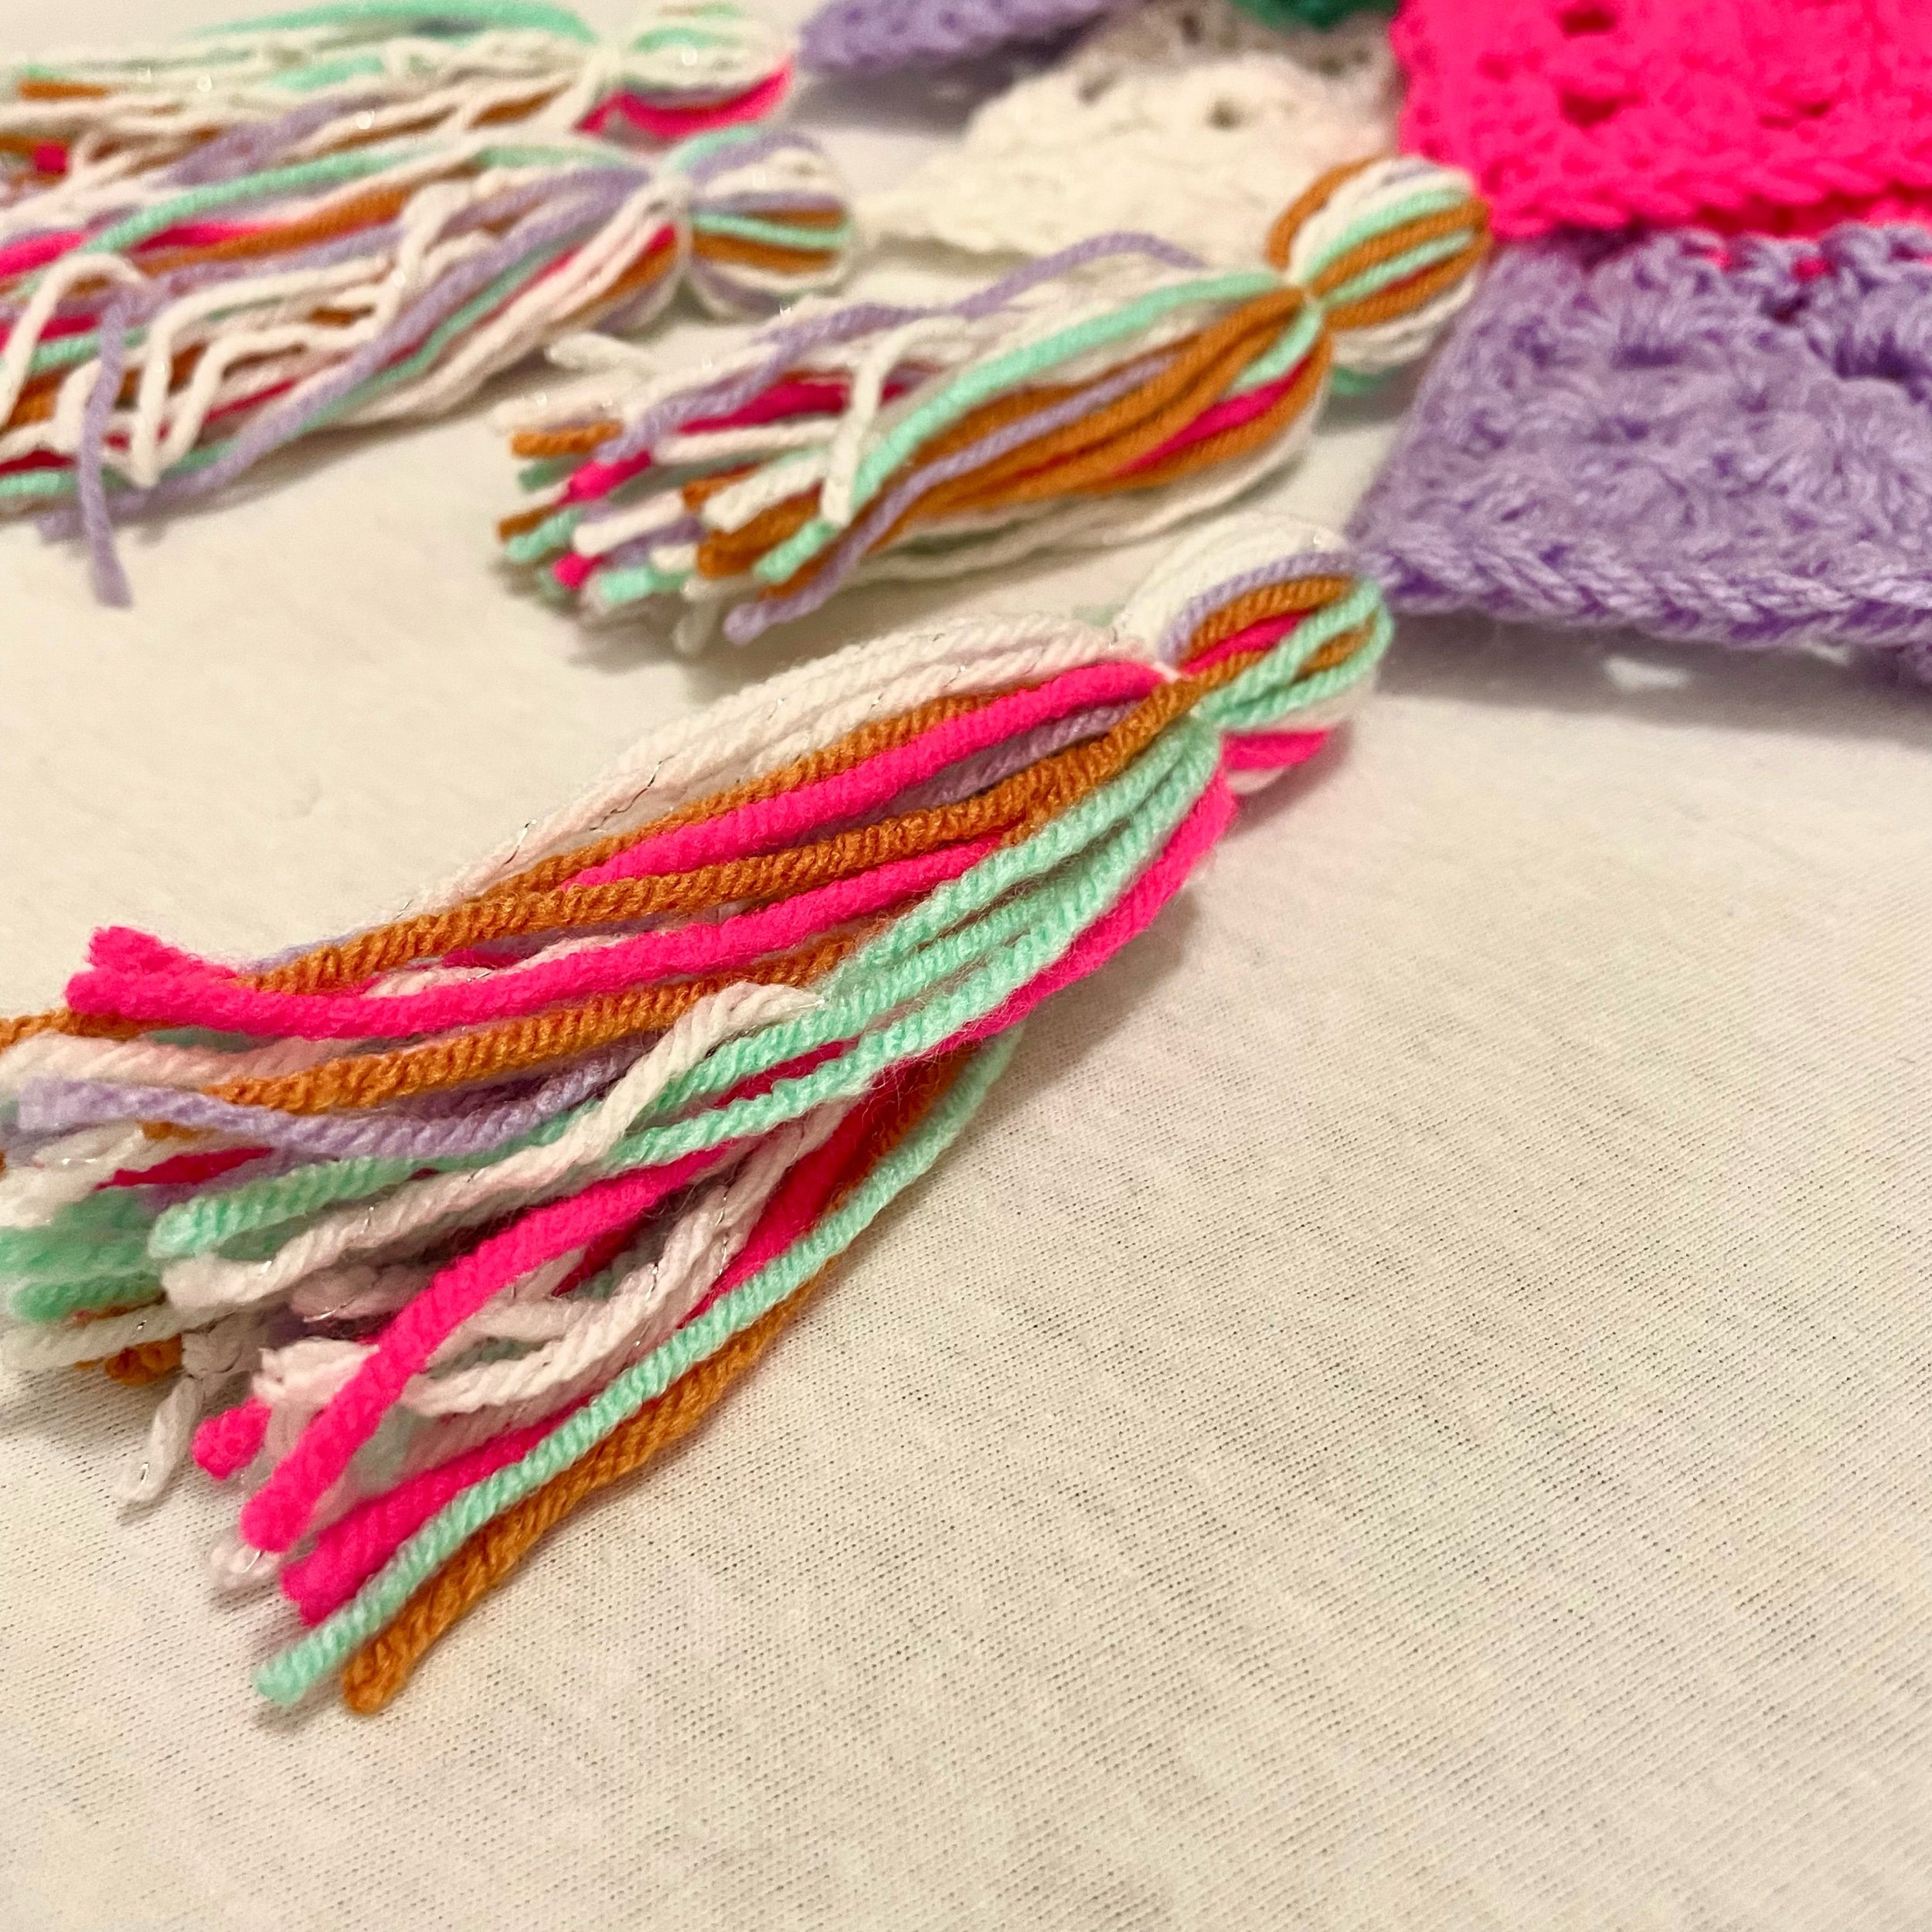
Tassels
If you don’t have a tassel maker, you can use your phone, or cut out a 6 inch piece of cardboard as a guide. Wrap yarn around the guide 20-25 times.
Fold a strand around one end.
Cut yarn on the bottom and remove the guide.
Fold a strand around the top of your tassel.
Trim the bottom to make sure it's even.
Make 4, 2 for each end of the scarf.
Tassel tip: Using all of the colours of the scarf in the tassels really ties it all together but monochromatic tassels are also cute!
This scarf makes a great gift for any loved one that you think might need a hug this winter! The airy gauge of these granny squares makes this scarf breathable but still ultra cozy, and there are so many cute ways to wear it making it an easy grab-and-go accessory that everyone needs to have in their closet!